VSCode Remote SSH整合ChatGPT extension (GPT4 + Google auth)教學 (MacOS)
在官方現有的solution中,尚未對remote SSH並且需要使用browser login的方案有詳細的教學(因目前token方案並無法提供GPT 4 model的選項,以及大部分的人可能都不是購買token方案的),故這份教學為整合了GitHub上其他開發者提供的解法,提供一個可行的方案。
Prerequisite
- ChatGPT Plus subscribers (使用Google帳戶)
- VSCode + Remote SSH extension
- 有Linux server,並且在SSH config已經設定完畢
- Local為MacOS
步驟
STEP 0: 請先使用VSCode Remote SSH連上遠端Linux server
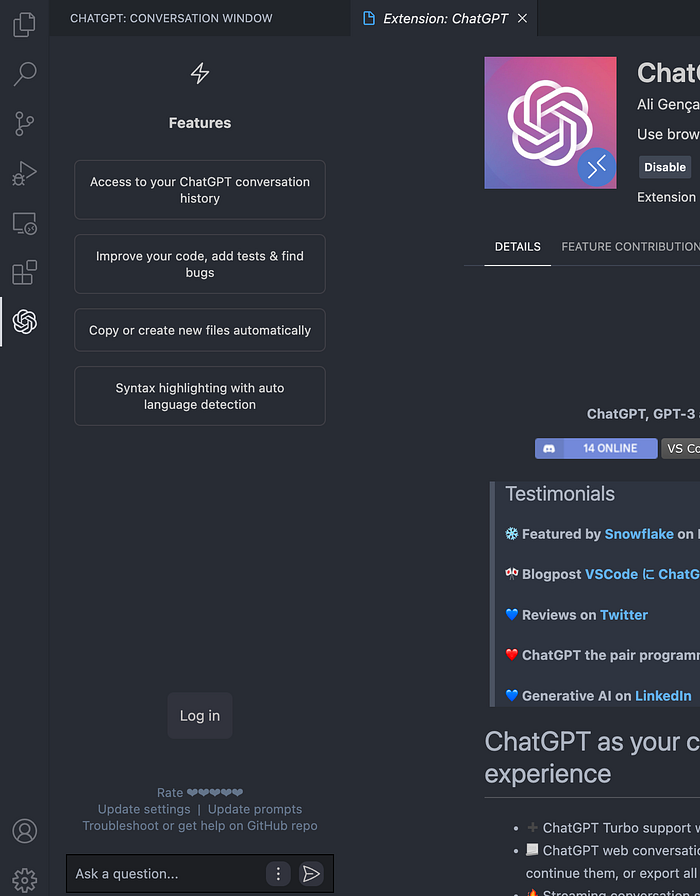
STEP 1: 搜尋並安裝VSCode ChatGPT extension

安裝後左邊應該會出現ChatGPT的圖示,點進去應可見

STEP 2: 更改setting
由此處可以點開設定

更改前面這兩項(User browser integration + Google Auth.)

往下找,選擇model (Browser autologin中的任何項目,依據需求選擇即可)

STEP 3: 在Linux server執行以下command
$ sudo apt update && sudo apt install wget xauth xorg
$ wget https://dl.google.com/linux/direct/google-chrome-stable_current_amd64.deb
$ sudo apt install ./google-chrome-stable_current_amd64.deb
STEP 4: 在Linux server更改/etc/ssh/sshd_config
$ vim /etc/ssh/sshd_config
# edit or add
X11Forwarding yes
X11DisplayOffset 10
X11UseLocalhost yes
STEP 5: 於Local MacOS,確認SSH_AUTH_SOCK已經設定了
$ echo $SSH_AUTH_SOCK
# should show /private/tmp/com.apple.launchd.xxxx/Listeners
STEP 6: 於Local MacOS,安裝XQuartz (https://www.xquartz.org/),安裝好後重開VSCode
STEP 7: 於Local MacOS,更改ssh config,在最前面加上
Host *
ForwardAgent yes
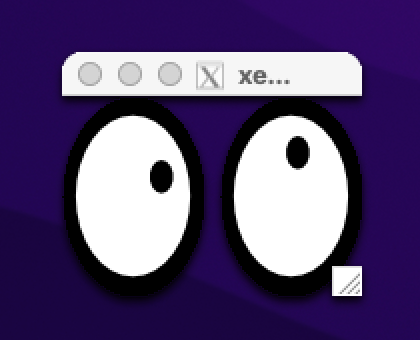
ForwardX11 yesSTEP 8: SSH remote server,在remote執行
$ xeyes若有成功在local跳出眼睛的視窗,那代表全部設定都成功了
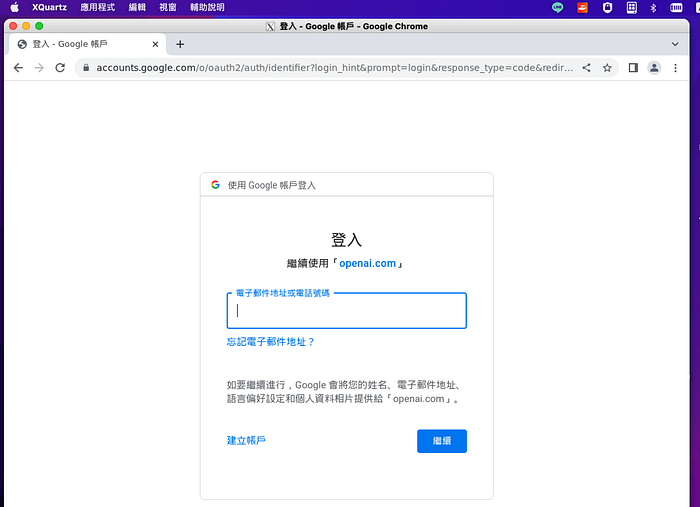
STEP 9: Log in
接著就能回到remote server中點下Log in
此時local端就會跳出登入畫面,登入後就能使用了
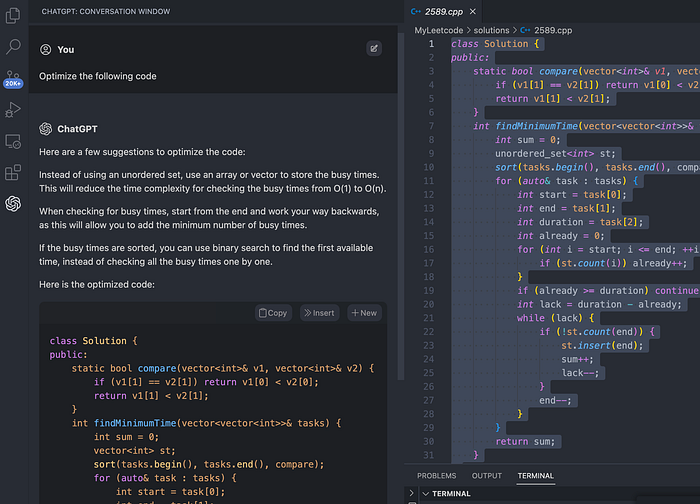
STEP 10: 開始使用
可以右鍵選擇使用ChatGPT優化code了
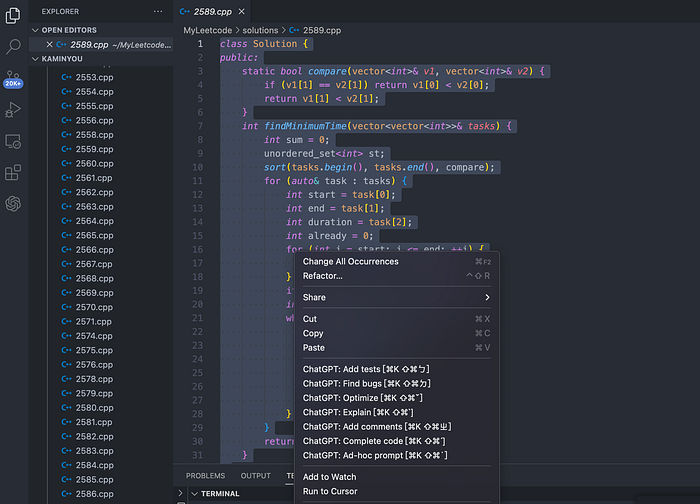
點下去後左邊的畫面如下